| GET A (HAMMER) GRIP | ||||||

 |
 |
| Like
most people who are somewhat creative, I have a lot of varied
interests. Sometimes this gets in the way of getting really good
at one thing. Usually though, what I learn in one area transfers
to some other endeavor. Such is the case illustrated here.
|
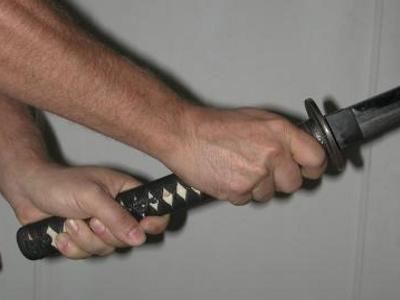
Iaido is the practice of Drawing and cutting with the Japanese sword. Every part of it is minutely scrutinized. To be honest sometimes this drives me up the wall. I just want to cut, not examine it Ad Nauseam . Well the truth is, cutting properly with a sword is not easy. So I have learned to examine all aspects of it. | The
sword grip is very basic. it is also somewhat complex and
essential for a good cut.
It is the same for smithing. A good grip is essential in order to be the most efficient and reduce the chance of injury. We are going to examine it. Yes, Ad Nauseam. |
| Before
we talk about grip lets talk about an very important concept called Te
No Uchi. Te No Uchi is the act of squeezing from the little finger
to the index finger at the point of impact. In a sword cut it
stabilizes the blade through the cut. If not done properly, the
sword will deflect, bend or both. This can be directly transferred
to a hammer. During the upswing the 5th, 4th and even the 3rd
fingers are relaxed. The sword/hammer is loosely held by the thumb
forefinger and a little by the third finger. Just before impact
the little finger starts squeezing followed by the others. This
adds speed, power and stabilization to the sword tip/hammer head.
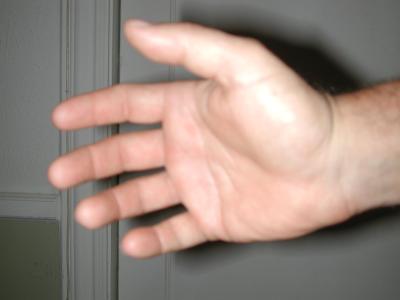
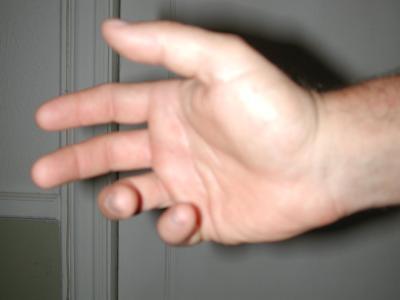
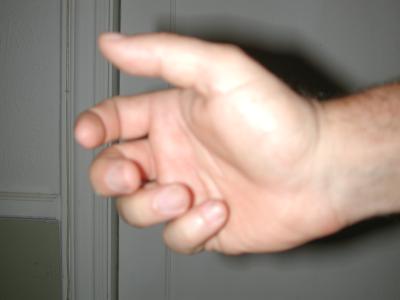
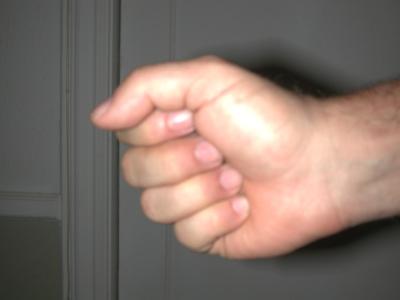
At right is a series of photos showing an exaggerated view of the process.
The top photo shows the hand relaxed and open. This would not be the case if we were holding a sword or a hammer, but it gives you the idea. As you can see the squeezing begins from the bottom up. It is a simple concept ,but takes some practice to get the timing right.
A better analogy, is if you had a tube of toothpaste in you hand with the top up and you wanted to squeeze out all the toothpaste from the bottom up. You would start squeezing from your little finger up working the toothpaste up the tube. As a finger squeezes you must maintain tension on it in order to keep the toothpaste from going back to the bottom of the tube.
|
 |
 |
|
 |
|
 |
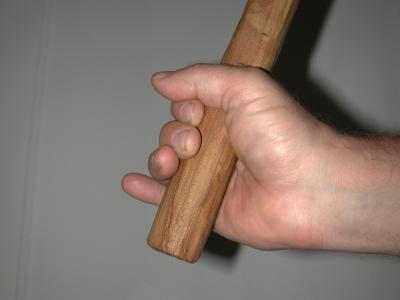
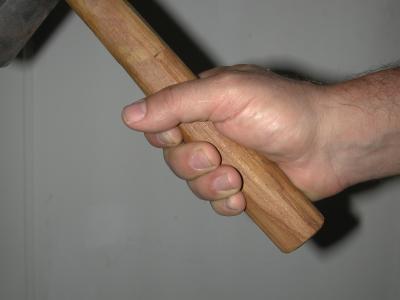
| Here
is the same idea only holding a hammer. Again it is exaggerated to
illustrate the point.
As the arm lifts the hammer, the wrist cocks back a bit and the hand relaxes. You need just enough tension in your hand to maintain control of the hammer. Keeping a death grip on the hammer as you raise it is a huge waste of energy. Relaxing the muscles not in use lets you hammer longer and with more control. Plus, it reduces the chance of arm and wrist injuries. You do not actually lift your fingers from the handle as shown. I did this for illustration purposes only. In practice you relax the tension on these fingers.
In the second picture the squeezing has started. The wrist motion is timed to rotate during the entire downward stroke adding speed to the hammer head.
In the final picture everything comes together. Ideally, the wrist completes its rotation a split second before impact and you squeeze through the blow for another split second. This transmits all the energy of your arm, wrist and fingers into the steel. If done correctly, you get very little shock back into your power train (fingers, wrist, arm, shoulder etc.)
|
 |
 |
|
 |
| I
may have gotten ahead of myself talking about Te No Uchi before looking
at a correct grip, but it is an important point to keep in mind while we
look at the actual grip.
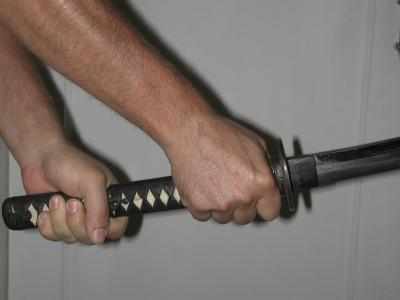
The first picture is a good sword grip. Notice the wrists. There is a slight bend in the right wrist and even more in the left. This is very important, the wrist is never flattened out. When impact occurs this adds strength and control to the wrist. Also notice that the fingers form a slight angle from perpendicular to the handle
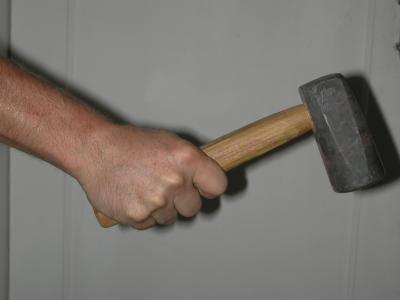
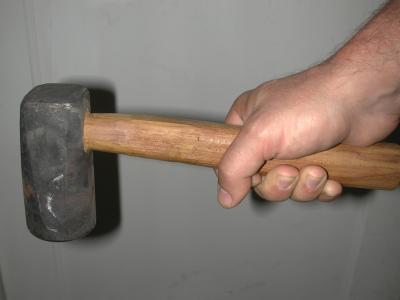
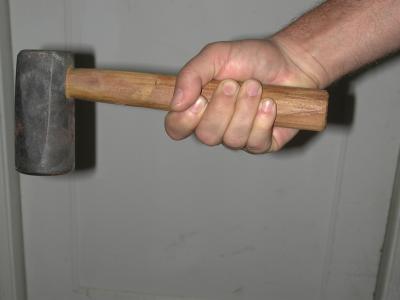
You can see the same thing with the hammer grip. there is a slight bend in the wrist.
|
|
|
|
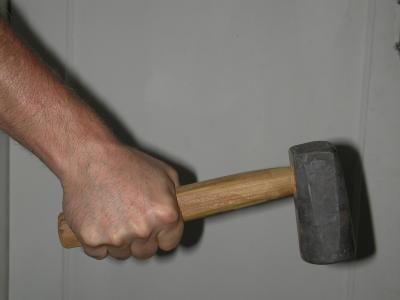
These photos are bad grips. Even though there is bend in the wrist, the fingers form right angle with the handle. This means that most of the grip is on the front two fingers and last two do not have much contact. This means loss of control and you have to squeeze the handle harder bringing on fatigue sooner. The flatter wrist also transmits more shock into you. |
 |
 |
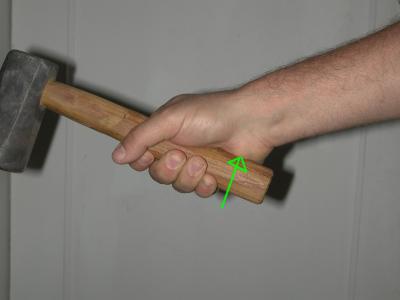
| The
top photo in this series is showing how your hand should be place on the
handle. The meat of your palm (arrow) should be on top of the
handle. This gives you control of he hammer and places your
wrist in a stronger position. it flexes the wrist out so that the back
of the hand is NOT in line with the top of the forearm. this ai a
well braced grip.
The bottom photo is a highly exaggerated, incorrect grip. The hand has rotated around so the the back of the palm is on the side of the handle. This lets the handle move up and down in the grip causing fatigue and loss of control. If you could see the off side you would note that the back of the hand and the top of the forearm are in the same plane. An injury waiting to happen. |
 |
 |
Over the years that this site has been up I have made it free for the taking. However, now I would like to spend more time on it and add more information. And as we all know time is money. So if you find some value here please make a donation. Thank you for your support. |